Time to make the doughnuts! Sorry, what I meant to say is time to make the dough - NUTS, I forgot to set the butter out! Well, let's get out all of the ingredients and let the butter get to room temp while measuring everything. (Before I do that, let me apologize for my photo layout - they were supposed to be 3 across, but Blogger is NOT cooperating with me today! Neither is the weather, as you can tell when the clouds really rolled in on some of my photos...) So, let's get started on our cookie dough!

While measuring ingredients, slice butter into a mixing
bowl to soften to room temp - I usually let the butter
sit for 1/2 hour to an hour (it doesn't take that long to
measure everything, so I like to pre-measure dry
ingredients for future batches if I have the time : )

Cream the butter (using paddle attachment on speed 1)

Butter isn't done yet...scrape your blade...

Butter is almost done...be careful
not to over-beat... it may cause
cookies to spread in the oven...

Butter is just right!

Now add the sugar...

...and mix on 1...occasionally scrape the blade...

...not there yet - don't over-beat...

...done creaming the butter and sugar!
(note: storm rolling in...)

Now add salt...

...flavorings (love my DASH measuring spoon)...
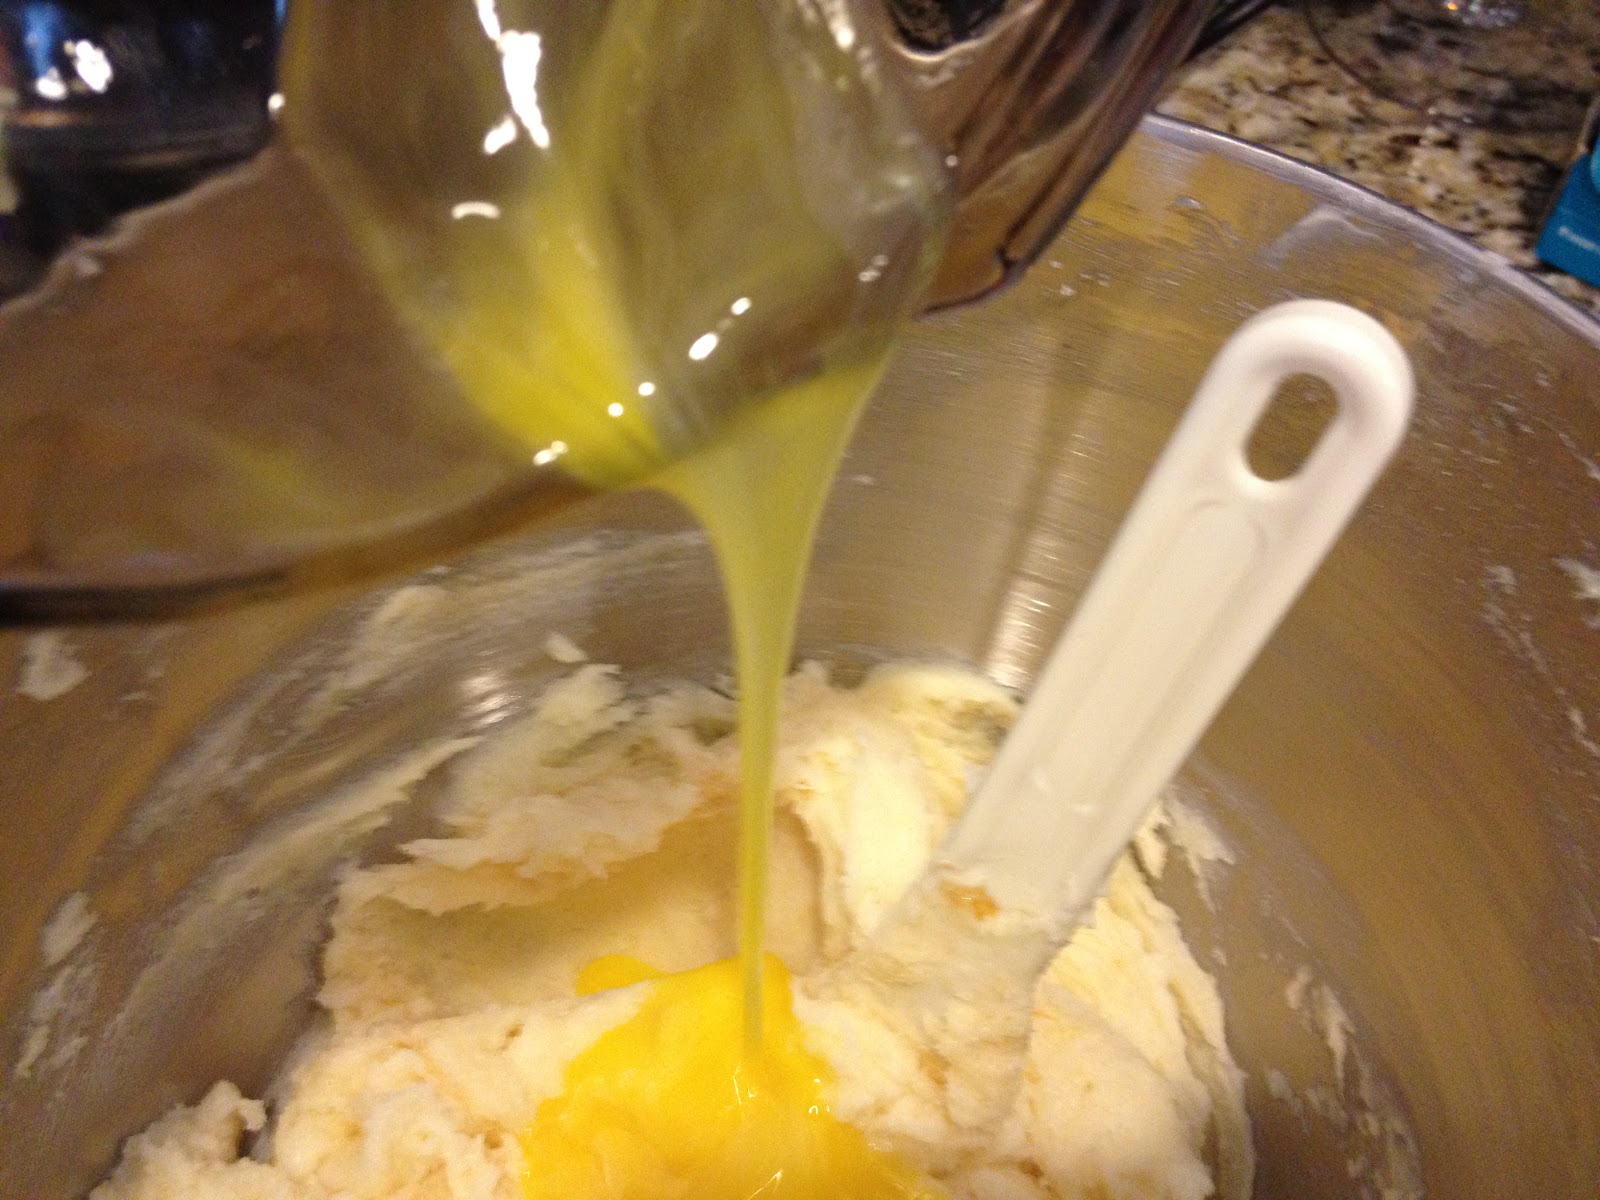
...the eggs...

...and mix on 1 - but not too long...

...until it looks like this!

Now add the flour, a large cup at a time...
(note: the storm has passed)

...give it a stir before mixing so it doesn't poof all over...
I pulse it a few times until it is just incorporated before adding
more flour - you don't want to over-mix the flour or your cookie
will make lots of gluten & be too tough! Remember to
occasionally scrape the bowl and blade so you incorporate everything.

After the last (4th) addition of flour - I'm making a double
batch so lots of flour here - I know
it is ready when it kind of just falls off the blade...
Pretty, isn't it? Well, it will be in a sec...

Take it out of the bowl, pat it - you can't NOT pat
your dough - & it's ready for rolling! See, pretty!

I like to divide the dough into 4...

...'cause it's easier to work with...
and because I like to roll my dough out...
BEFORE chilling! I'm such a rebel!

I fold a piece of parchment in half, and
put the dough on one side...

...then fold the other side over it...

...and roll...
...until you have the desired thickness. You can either eyeball it, use rubber rings, a dough-board, paint sticks, or a handy-dandy Joseph Joseph adjustable rolling pin - perfect every time! (Note: No extra flour used for rolling! If you typically have issues with spreading, using some flour does help, but don't use too much.)

Now, for my favorite part... the
FLIP-FLOP! I'm pretty sure I invented it
myself, but I may have seen it somewhere before
& just don't remember... my husband thinks I'm a
genius, so let's just say I invented it... Anyhoo,
Put a piece of parchment over the top
of your dough...gently smooth it on there...

...now slide a thin flexible cutting mat (or something
like it - sometimes I use cardboard) all the
way under the bottom to support the dough...

...gently place a smaller thin flexible cutting
mat (or the like - LOL, love that phrase!) over the
parchment covered dough...
*This is where the next photo would be... sorry there is no photo
of the actual FLIP-FLOP as it requires both hands...I'm not that talented...
Now, (if you are a righty) gently place your left hand over
the top mat, and grasp the bottom mat with your right
hand... Lift the whole thing up, and flip it, making sure
to flip your left hand as well, supporting the dough,
and then gently remove your left hand from the bottom.
The small mat will now be underneath, and the
larger mat will be on the top.

See? Now, lift the larger mat off of the top, and
peel away the parchment (the piece you rolled on.)

Now, you are ready to put your dough on
a pan to chill in the fridge.

Simply lift it from under the bottom
mat, and slide it onto a pan!

Repeat for the other 3 balls of dough...

And now...

Cross-stack the pans so you can fit them
in the fridge...

...and chill for several hours before cutting.
(Hint: Do not have anything garlic-y in your
fridge - the dough will pick up the odor! Yuck!)
They are now also chilled enough to stack and
store in Tupperware for up to a few days
(how handy, there is already a layer
of parchment under each one!) or, you can
wrap each layer in Saran wrap, and even freeze it!
So that's How I Roll... Just remember - scrape down your
bowl & blade as necessary, don't over-mix and handle gently
after rolling, or you will have dented dough. Which isn't pretty.
Oh, and before you go...

...find someone to do the dishes!
See you next time for a cut & bake session!
Are there Tupperware containers that you would recommend for storing the rolled out dough in the fridge? I don't think I have anything it would fit in.
ReplyDeleteJanine - I mostly use 9X13 Rubbermaid Takealongs with the red lids - I think they came in a 3-pk. If you have smaller containers, either cut the dough in half after chilled or roll them out smaller...OR you could wrap them in Saran and store in a freezer Ziploc. Just make sure they are well wrapped. (I like to use the containers because I can stack other things on top of them : )
DeleteAwesome! Thanks for the tips! Always looking for ways to be a little more efficient. Now, can you help me clean out my fridge to free up some space? ;)
DeleteJanine - sure lol! The fridge does get a little tight for those few hours but once the dough is in the tupperware it's all good!
DeleteAwesome tutorial! I've started rolling mine out before chilling it in the fridge and it saves a little time!
ReplyDeleteFluffybutt - for me it saves loads of time to roll before chilling since it takes me forever to roll hard chilled dough, and then it's ready to cut whenever I have time (even at 2AM!)
DeleteYour cookies are amazing! I love your tutorial but I'm not seeing the ingredient amounts, do you have the recipe posted somewhere? I can't wait to try your icing recipe, I'm not a lover of royal icing so I'm anxious to try yours!
ReplyDeleteIm sorry, I don't know if my comment was clear, I see your icing recipe, I just don't see your cookie recipe. Your cookie cutouts are so crisp and thick, just beautiful!
DeleteHi Dora, sorry I have been on vacation & couldn't access blogger, and didn't have your email! I haven't posted the recipe on here as I am working on weights before I do. I would be happy to email it to you if you would send your email address to SweetPsSweets@gmail.com (and thanks so much for the kind words : )
DeleteMichelle - I just sent you an email about your recipe as well. Thank you. Joan
ReplyDeleteJust emailed you : )
DeleteHi Michelle. I don't see you're recipe. Would you be able to email it to me? Anavruba@yahoo.com
ReplyDeleteHi Ana! I hadn't intended on posting the recipe online but if you shoot me an email I will gladly share it with you : )
DeleteLol just saw your email there - will try to get it to you in the next day or so : )
DeleteThis is a terrific post and thank you for sharing! Do you have ingredient amounts? I do not see it here and since your glaze recipe is so amazing I am sure cookie recipe is as well! I would greatly appreciate it if you could post or email to me?
ReplyDeleteI hope you have luck with the recipe... I will be doing a post soon on it : ).
Delete